
CREATING A BLOG POST IN SQUARESPACE THAT GOOGLE AND PINTEREST WILL ADORE!

BLOGGING IN SQUARESPACE
If you own a Squarespace site and go to find help online for doing stuff with your site to make it pretty and act right - my guess is you get a lot of techie worded posts and moving screenshots that give you a headache ... so let's style this up a bit for the creative industry and I will show you how to create a beautiful post in Squarespace that Pinterest and Google will eat up like candy!! I have been creating blog posts using Squarespace for 12 years and I absolutely LOVE it.
LET'S DO THIS!
Right now I am obsessed with Haute Stock Styled Stock Photography ... so I will use their stock images to showcase how I put a blog post together using Squarespace 7.1 ... if you have SS 7.0 it’s pretty similar with a few minor tweaks …
Because of my blog editor background I like to image select first ... it helps mold my brain to really meditate on what I am posting about ... the way I like to do this is create a folder within the main folder of images that I will pull the 'post' images into ... for this sample I have called that folder 'for post' ... shown below:

Image selection is KEY to creating a blog post that clients will love and that will show you off in the best ways possible. For this pretend blog post I selected 8 images that I love ...
Below are a few of the images I selected for the post:

Now it's time to take this to Squarespace. So, when you login to your Squarespace site and go to pages, then blog, you will see a page that looks like below:
The '+' sign is what you would click to create a new post (on the left hand side - top right)

After I create a new post I like to create a strong title that will pull in the attention of my audience. But the title won't necessarily be the 'url' that this post keeps! I like to take things one step further for SEO and create a new 'url' for the post. To do this you need to hit 'done' at the top left of your post after you have created a title and select to ‘save as a draft’. This establishes the post as a draft and also makes it possible to edit the 'url' of the post. Now, find your post in the list to the left and click on the 3 dots alongside the title and select ‘settings’ from the list of options … the 3 dots you click on look like this:
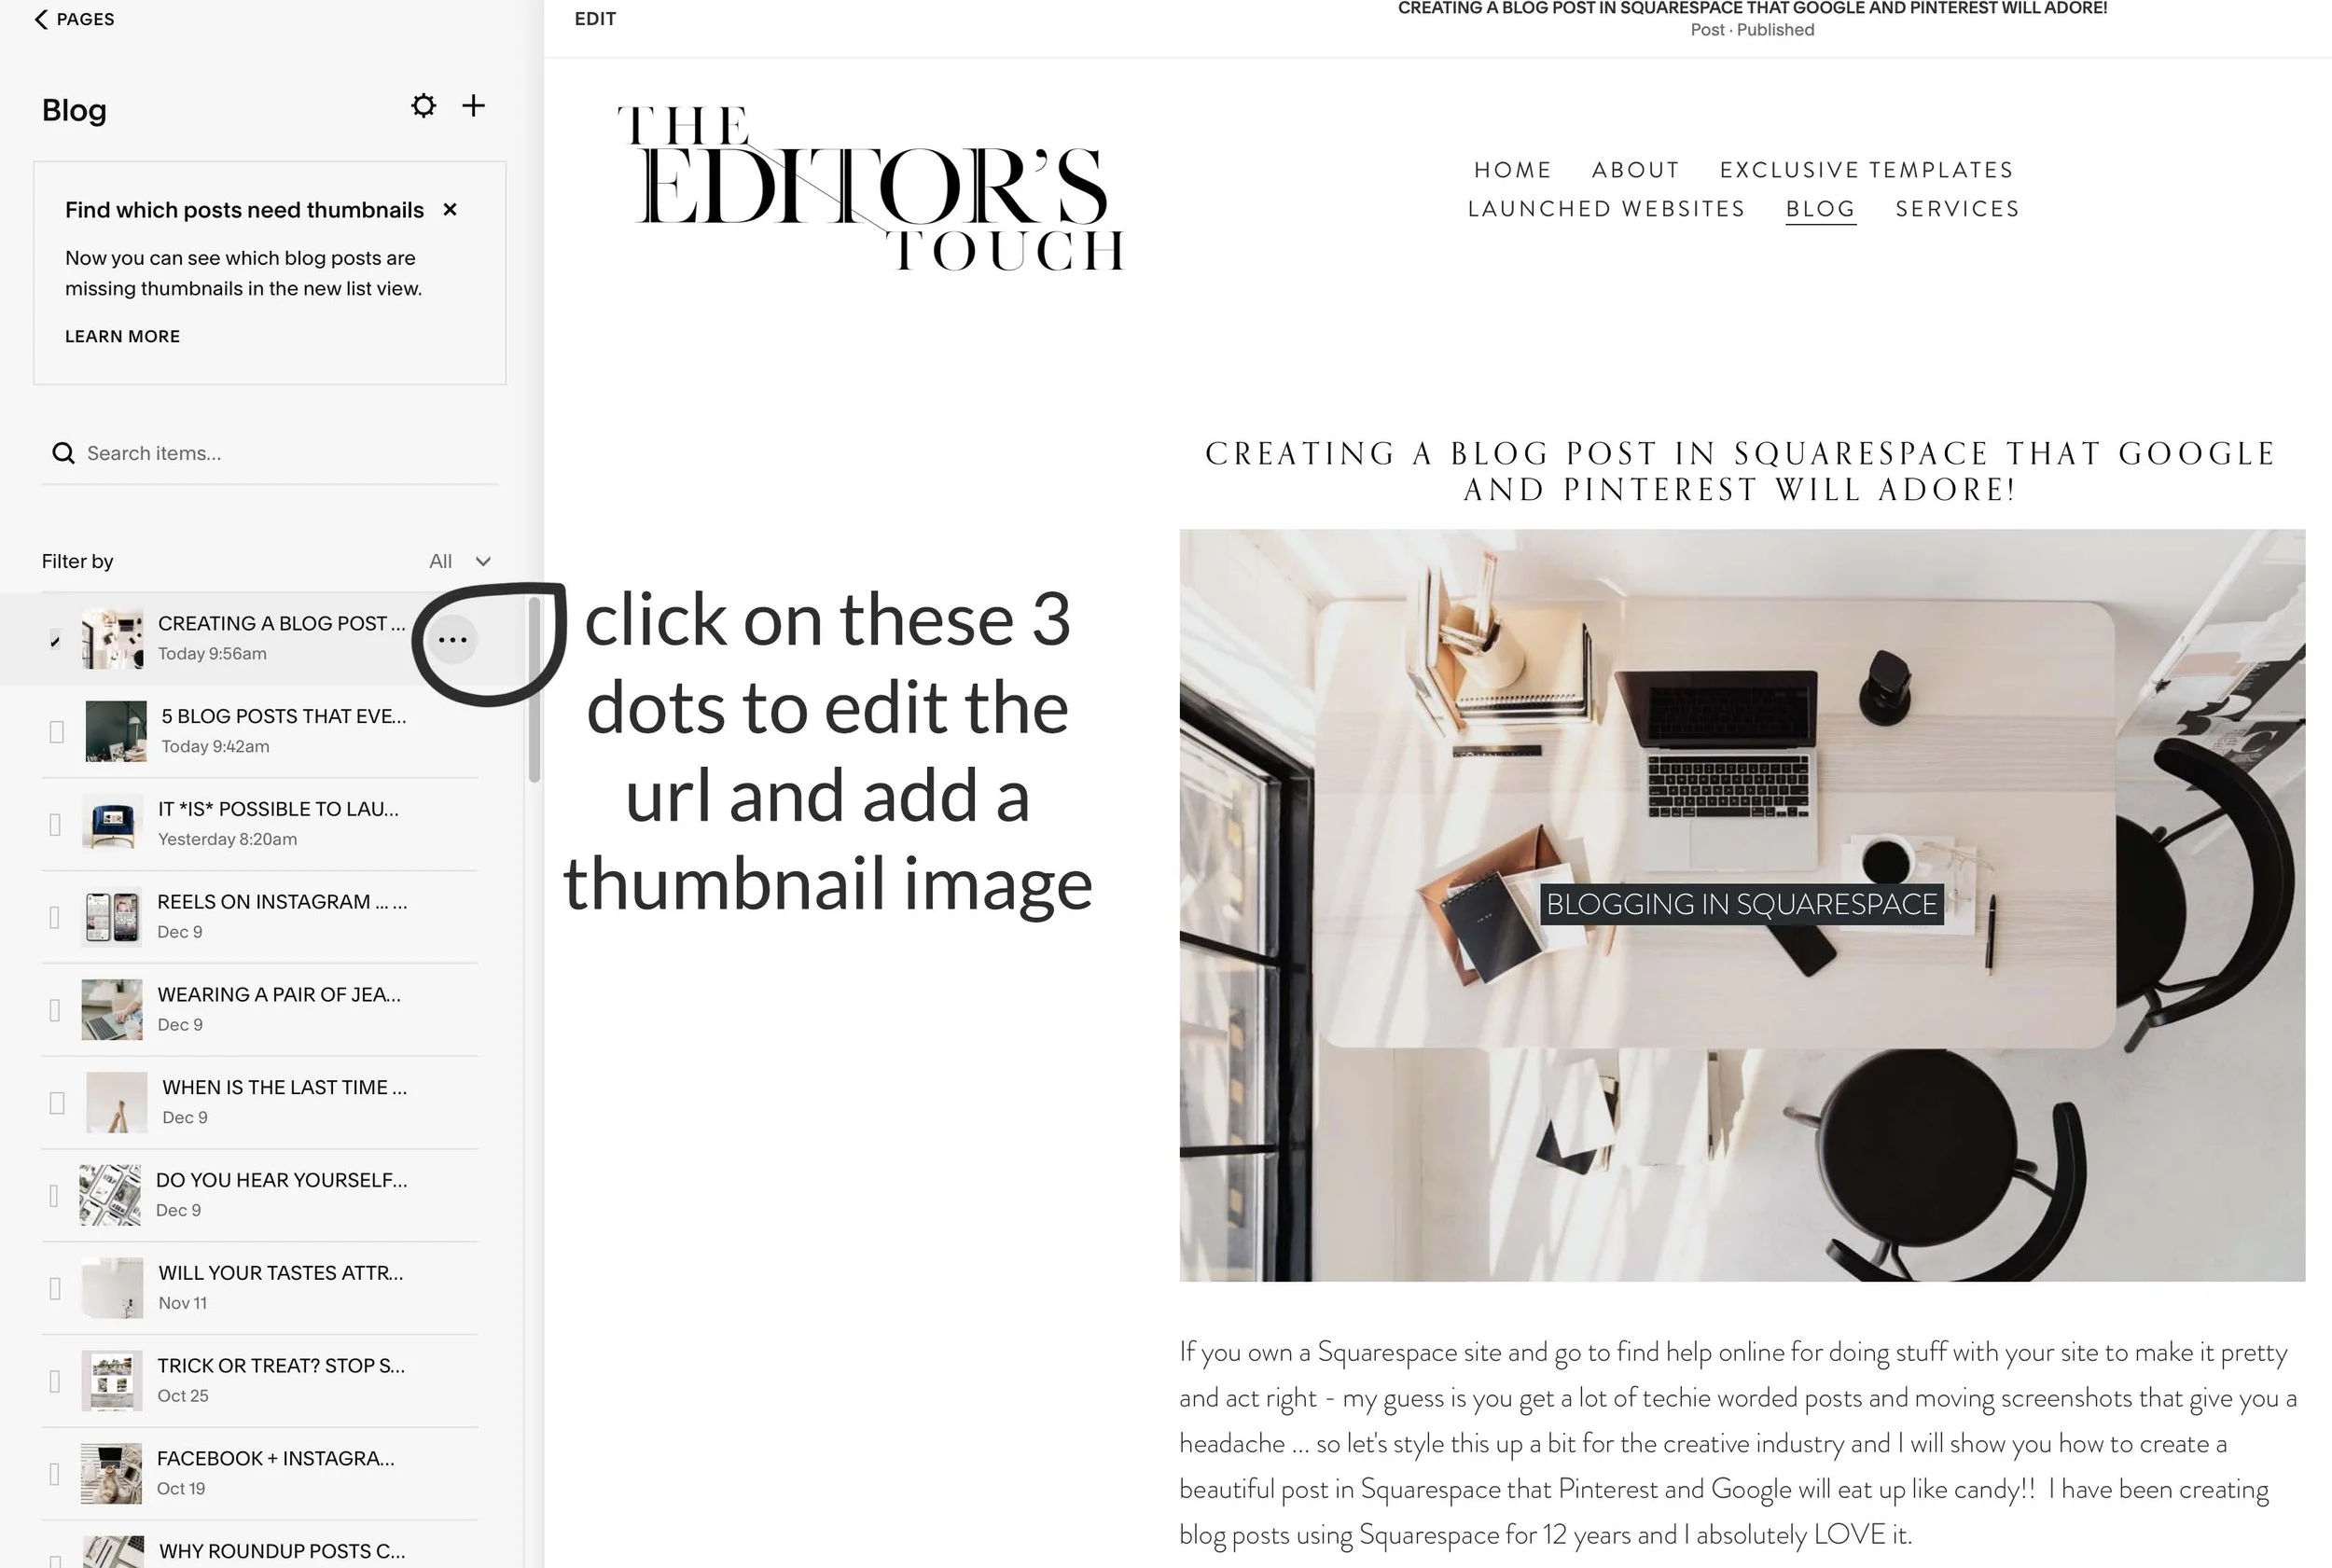
Once you click on ‘settings’ from the 3 dots, you will see this panel pop up:

As you can see above along the far left you have 6 navigation buttons: content, options, SEO, social image, share, and location. To change the 'url' of your blog post and to add a thumbnail you want to hit 'content' ... you will erase everything after the last '/' and create your own. Be sure to use '-' between every word, as Google reads those as spaces.
IMPORTANT STEP:
Always make sure you upload a 'thumbnail image' in the 'content' section ... this is the image that your grid blog page will pull.
Ok, now that we have established a Google friendly URL we are ready to add the content and publish this puppy!! Go ahead and hit save at the bottom of your post so that you don't lose any of your work so far ... that is a good thing to do every 5 minutes or so ;)
The next step I like to take is adding images ... bring in the beautiful shots by Haute Stock!!!
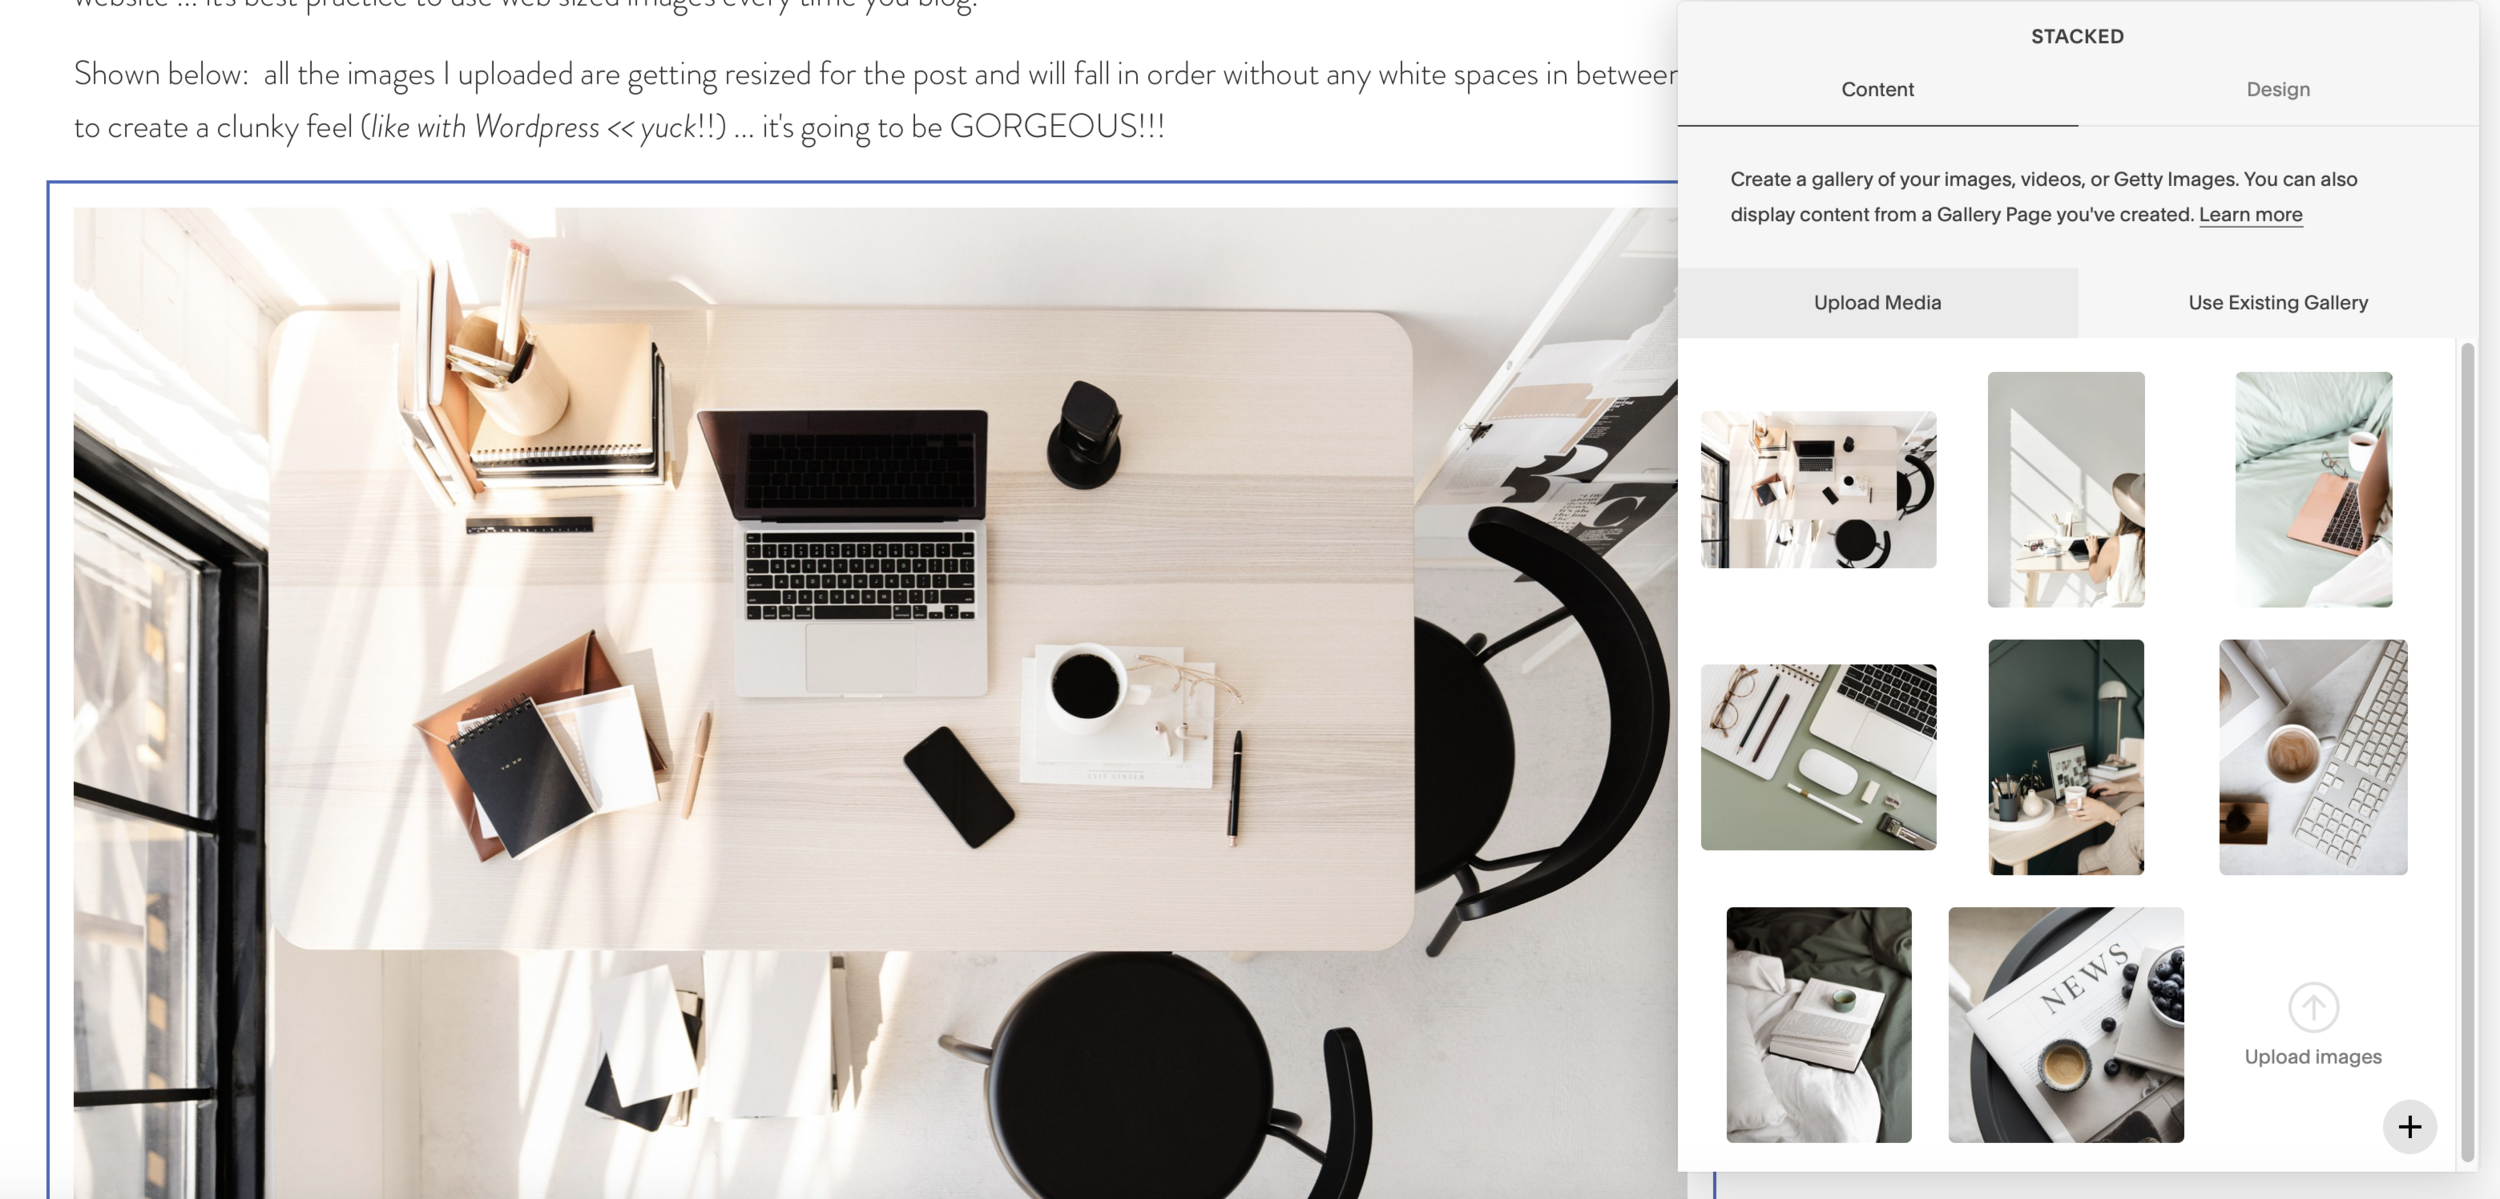
When you are using Squarespace and you mouse over your post, you will see little blue ‘+ signs’ ... like this:

When you click on them, the building blocks of Squarespace will appear … the box that will appear when you click on a ‘+ symbol’ looks like this:

You will click on those to add images to the post ... I like starting each blog post at the top with a single image ... then a text blurb ... and then filling in the bottom of the post using 'stack' for the rest of the images.
To get to the ‘Stack Gallery’ option, use your blue plus signs, select ‘gallery’ from the box of options that uploads … and then within that gallery box you can choose your layout … once the images are uploaded, you can use the gallery box to reorder them.
VERY IMPORTANT TIP: Once you add your images you are NOT done with this step. The most important thing you can do for your blog post is to add 'alt' text or 'image' text to EACH INDIVIDUAL PHOTO. Geez, Heather, that sounds time consuming!!! Yes, it is. It's worth it though!! Here's how you do this:
BING: in your image gallery mouse over an image. You will see 3 options pop up: a wheel shape, a pencil, and a garbage can ... hit the wheel shape.

BANG: When you hit the 'wheel shape' you will see an Edit Image box appear ... put your cursor in the 'enter an image title...' box:

BOOM: Type in text that you feel will help clients find you on Google and Pinterest. DON'T SPAM the image ... the text needs to be true. So, you can add what the image is, the photographer credit, the wedding venue, your business name ... I like to separate each 'word grouping' with this guy: | << I srsly don't know the name of that symbol ... we'll just call it a really long capital 'i' << lol ... then hit 'save' and 'apply' and do it to EVERY IMAGE in that grouping ... and voila!! You've just made Google and Pinterest VERY VERY happy :)

Ok, next add your text blurbs, credits and links, and hit 'publish' ... cool, right??
Are there more things I do for my clients to make their blog posts AMAZING??? Yes, of course! But this should give you a general idea of how to create a post in Squarespace 7.1 that doesn't suck ;) And if you take just one piece of advice from this post it's this: ADD TEXT TO EVERY IMAGE!!!
XO~ Heather