
HOW TO EDIT GALLERY IMAGE ORDER IN SQUARESPACE 7.1

When I am designing websites for my clients, I optimize and upload culled images to individual galleries … but since all of my clients have a specific ‘order’ they like images to appear, I teach them how to easily organize their pre-designed gallery pages … I love how EASY Squarespace makes this once the website is designed … it makes updating a breeze!!! See below the steps to take: (huge thank you to Jose Villa for giving me permission to use his images)
Once you login to your Squarespace 7.1 website and click on the ‘website’ section to view the pages of your site … once you can see all the pages of your website, choose the gallery page you want to edit by clicking on it in the lefthand side of the backend of your site. (the image above gives a visual reference)

After you click on the gallery page you want to work on, this page will open up showing you a list of every page within this portfolio / gallery section … click on the gallery / page you want to edit by selecting it from the list of options on the left. (the image above gives a visual reference)

Once you have selected the page from the list on the left, you will see the gallery on the right and then an ‘edit’ button near the top left … click on the EDIT button. (the image above gives a visual reference)
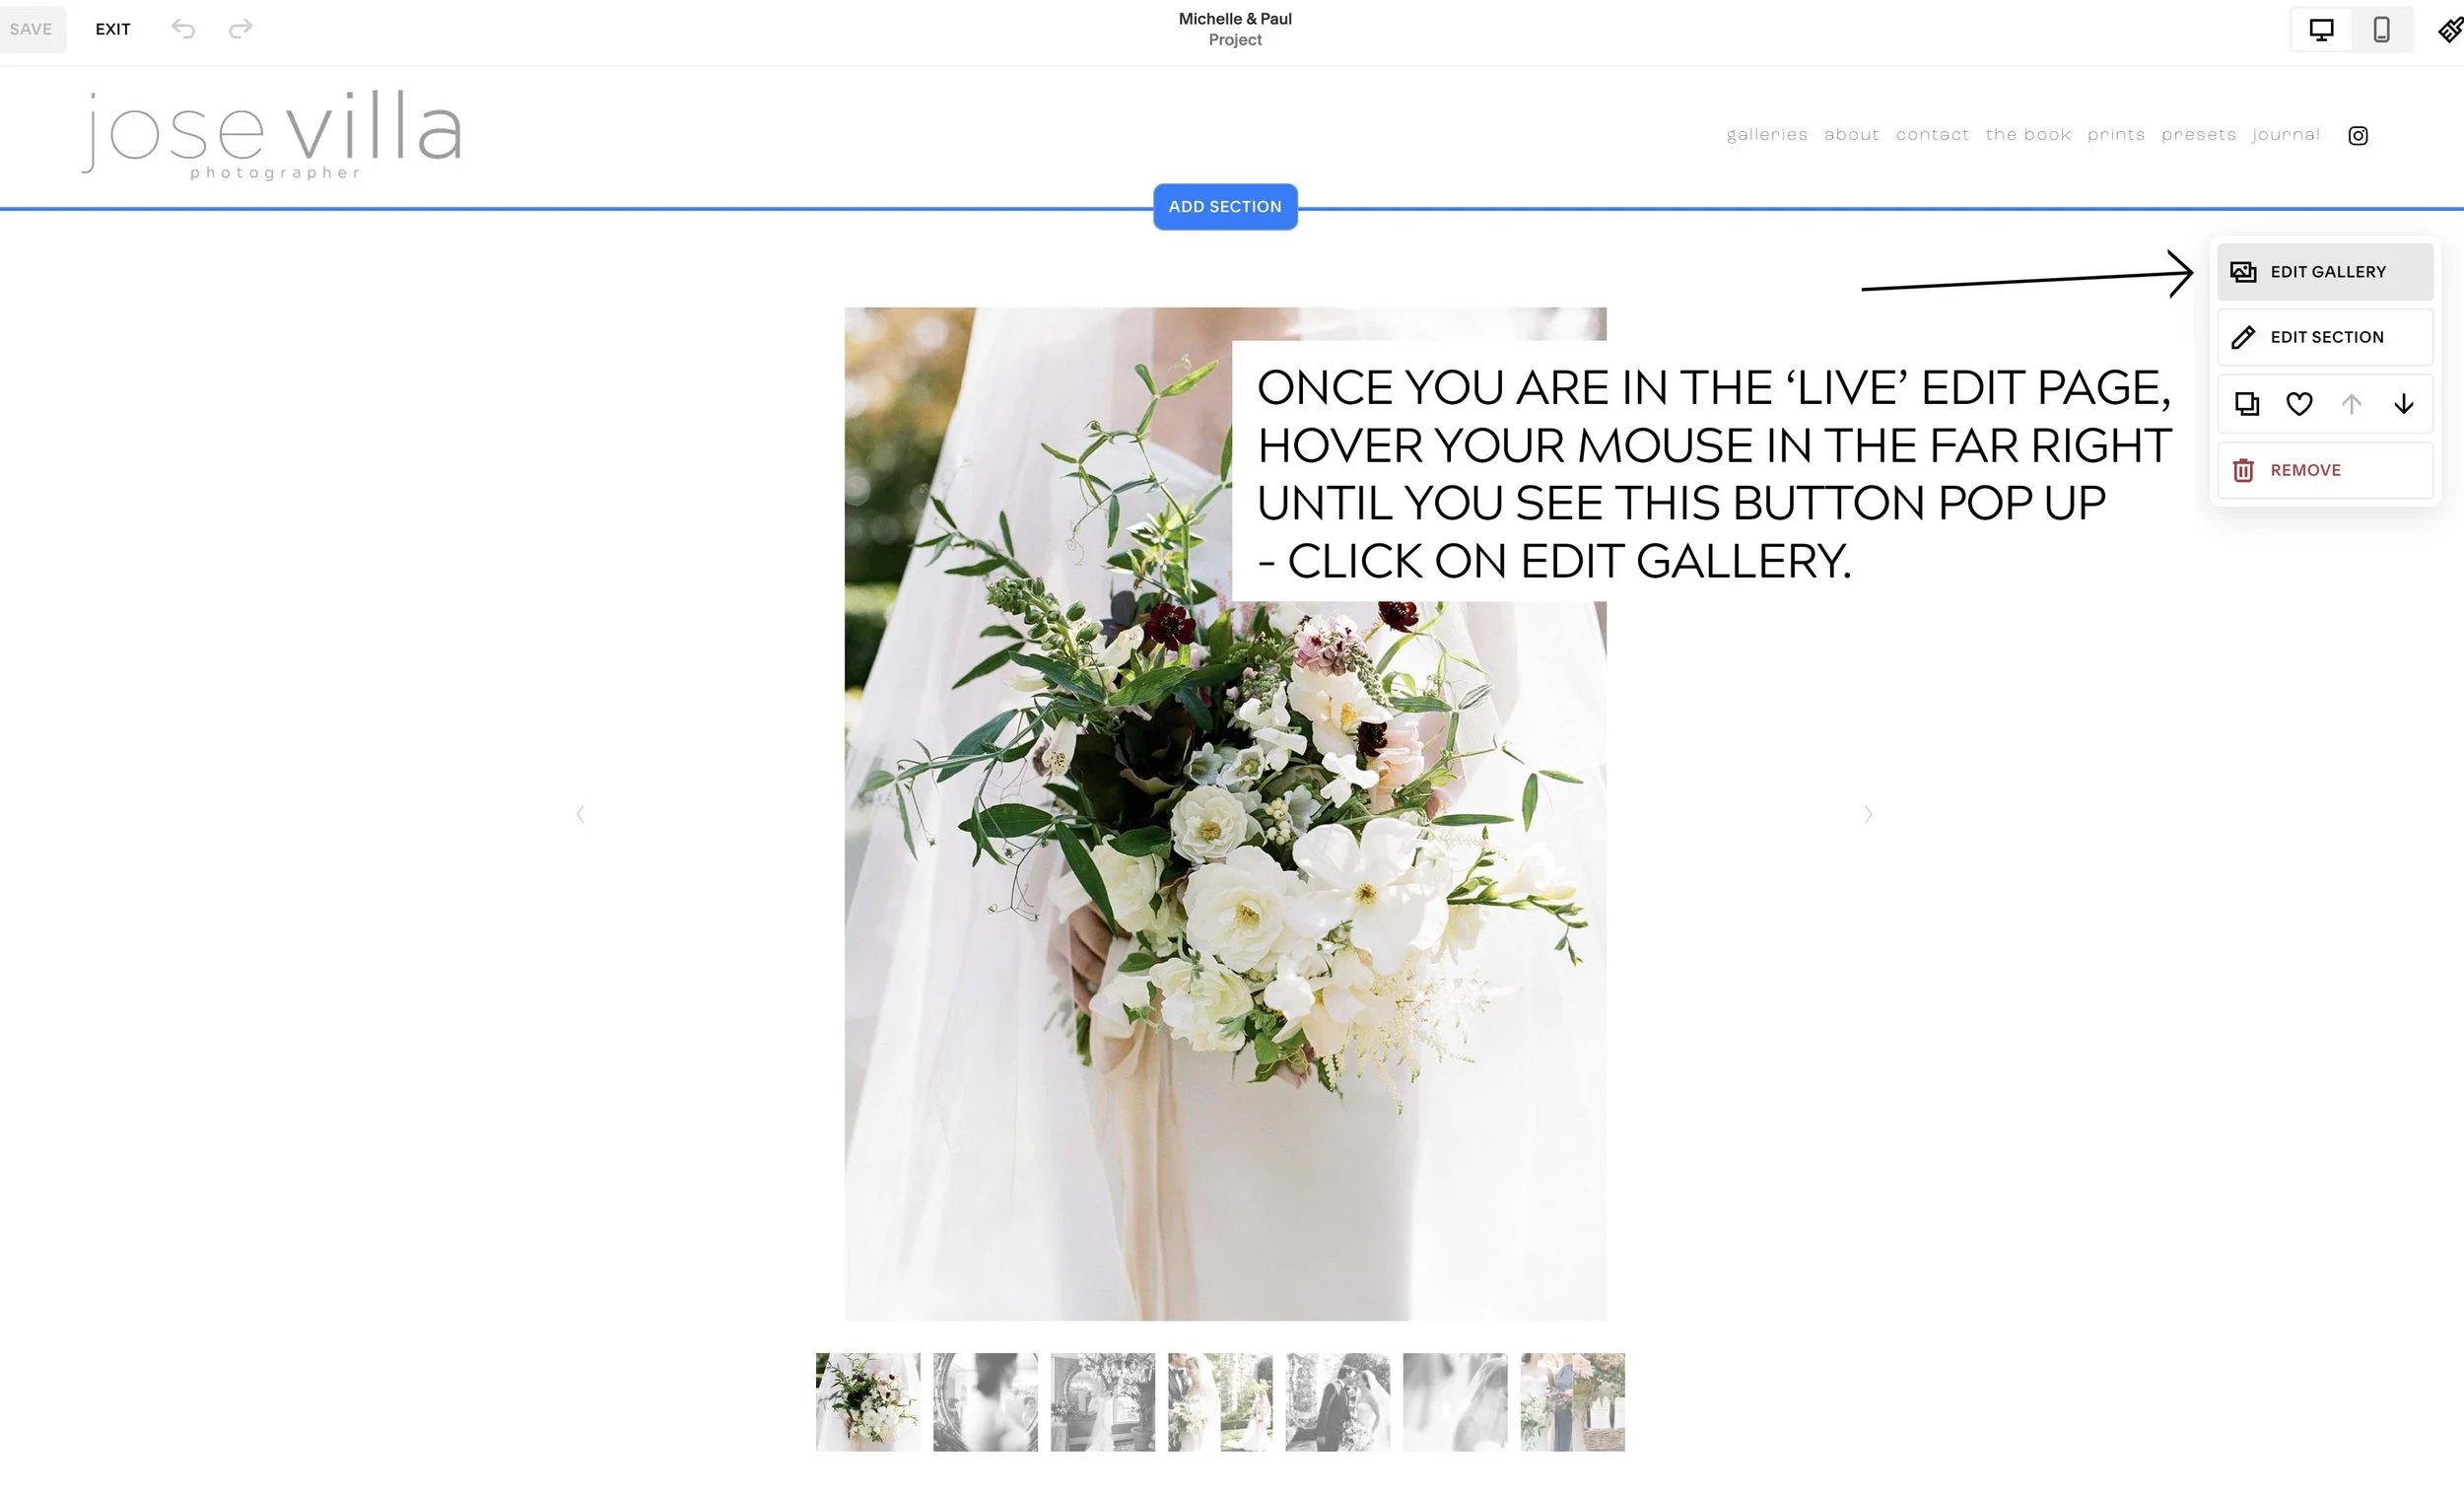
NOW you are in the editable section … anything you do from here on out can and will change the look of your website (you do have the option to ‘not save’ if you make any mistakes or do something unwanted, so don’t worry too much :) Once you are in this section, wave your mouse in the right corner until you see the options pop up that say: EDIT GALLERY, EDIT SECTION, etc … click on EDIT GALLERY. (the image above gives a visual reference)

Once you click on EDIT GALLERY, this section will open up … you can now edit your images … the order can be edited by clicking on an image you want to move, holding down your mouse, and then dragging it around within the box of images. Once you let go, that image will now appear in a different place. Keep doing this until you like the order of the images. (the image above gives a visual reference)

This is also where you can delete images and add more … even ‘edit’ images to crop them if you want … the garbage can icon (as you hover over an image) will delete it … and the ‘plus sign’ icon showcased here in the image above will allow you to add more images to the gallery page. (the image above gives a visual reference)

When you have completed your gallery page edits, you will see a SAVE or EXIT button on the near top left … if you hit SAVE, all your changes will be saved … if you hit EXIT, it will give you the option to SAVE or EXIT without saving any of your edits. (the image above gives a visual reference)